You've got a beautiful rug that's lost its shine, right? Don't fret. You can bring it back to life with some simple tools and techniques. This guide will walk you through the process of cleaning your rug at home, from removing furniture and inspecting for damage, to deep cleaning and maintaining its longevity. So let's roll up our sleeves, because we're about to get your rug looking as good as new!
- Regular vacuuming and spot-cleaning are important for maintaining a clean rug.
- Different cleaning methods should be used for natural fiber and synthetic rugs, with cold water being best for wool rugs.
- Professional cleaning may be necessary for delicate rugs.
- When cleaning a rug, it is important to clear furniture and objects off the rug, remove dirt and debris, mix the cleaner properly, and do a color test before washing and rinsing the rug.
You've got to understand, regular cleaning of your area rugs isn't just about appearance - it's crucial for extending their lifespan and making the most out of your decor investment. The importance of rug cleaning goes beyond the superficial, affecting not only how your space looks but also the overall health and longevity of the rug itself.
Proper rug maintenance involves more than just a weekly vacuum. You need to tackle stains promptly and consider a deep clean at least once or twice a year. This is where DIY rug cleaning tips come in handy. From using white vinegar to remove stains to drying your rug thoroughly after washing, these tips can go a long way in ensuring that you preserve the beauty and integrity of your rugs.
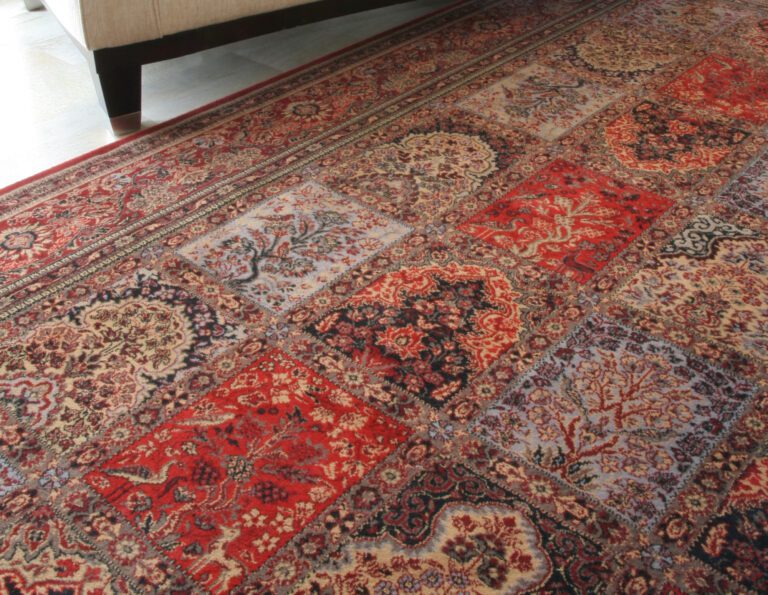
However, some situations call for professional intervention. If you have an antique or Persian rug, or any type with delicate fibers, professional rug cleaning could be beneficial. These experts know how to handle different types of materials without causing damage, which is one advantage they have over DIY methods.

Beware though; there are common rug cleaning mistakes you should avoid. Over-wetting during cleaning can lead to mildew growth while scrubbing too hard may cause fiber damage. Also remember not all rugs are created equal; synthetic ones differ from natural fiber ones when it comes down to care requirements.
So remember: take good care of those beautiful area rugs! They're not just floor coverings; they're investments worth protecting.
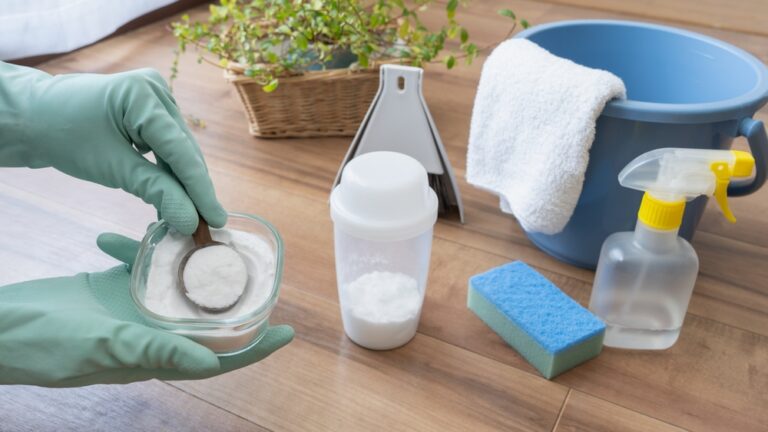
It's important to gather all the essential tools before starting, which include a vacuum, bucket, mild soap and a soft-bristle brush. This rug cleaning equipment is key to your DIY rug cleaning project. Keep in mind that different types of rugs may require different care; so always check the manufacturer's guidelines first.
Now, onto some rug cleaning tips to ensure you get the best results. Begin by vacuuming your rug thoroughly on both sides to remove any loose dirt and dust particles. You might be surprised at how much dirt gets trapped in your rugs over time!
Next, fill your bucket with warm water and add a suitable amount of mild soap according to the product instructions. Use your soft-bristle brush to gently but firmly scrub the rug with this cleaning solution. Be careful not to scrub too hard as this can damage your rug's fibers.
Afterwards, rinse out the soap using clean water until no suds remain. This is an integral part of the rug cleaning process – if you leave any soap residue behind, it can attract more dirt over time.
Finally for our DIY endeavor: drying! Lay out your freshly cleaned rug flat in a well-ventilated area or outdoors under indirect sunlight (direct sunlight could cause colors to fade). It may take up to 24 hours for it dry thoroughly.
With these simple steps and consistent rug maintenance, you'll prolong its life while keeping it looking beautiful for years.
Before starting with the cleaning process, you'll need to clear all furniture and objects off the rug and find a suitable place for it. This is where your initial preparations come into play. Consider choosing an outdoor cleaning station if possible; a sunny, dry day works best for this. Having ample space to work will make the deep cleaning process much easier.
Once you've selected your spot, start by testing cleaners on a small corner of the rug. You don't want any harsh chemicals damaging or discoloring your precious rug fibers. Mix up your chosen cleaner according to its instructions and apply a bit to an inconspicuous area first. If there's no adverse reaction after about ten minutes, you're good to go!
Now let's move onto the deep cleaning process itself. Have patience here! You'll want to thoroughly wash every inch of that rug – not just once but multiple times over! Use a soft-bristled brush or sponge and work in sections until you've covered the entire surface area.
And remember those pesky stains? Here's where stain removal techniques come into play: tackle them directly with appropriate products, applying more pressure as needed while being careful not to damage the rug fibers.
After washing comes rinsing – do this until water runs clear from beneath your rug. Lastly, allow it to air-dry completely before bringing it back inside. Congratulations! You've mastered DIY rug cleaning at home!

After all that hard work, don't forget to perform a detailed inspection of your area textile to make sure you haven't missed any spots. Implementing rug inspection techniques is crucial to ensure that the cleaning process has been successful. Take an up-close look at the fabric strands, checking for any leftover dirt or stains. Run your fingers through it as well; this will help identify if there are still tough spots that aren't visible.
Understanding rug cleaning benefits will motivate you even further in maintaining your rug's cleanliness. A clean rug not only looks good but also promotes better health by reducing allergens and bacteria in your home.
Your rug cleaning tools play a significant role in ensuring a thorough clean-up process. Always remember that using appropriate tools such as vacuum cleaners, stain removers, brushes and sponges enhances the effectiveness of your cleaning efforts.
Rug placement tips come in handy after completing the cleanup process. Make sure where you place your rug doesn't expose it to excessive dirt or spills which could lead to frequent rigorous cleanups.
Lastly, don't overlook the importance of effective stain removal methods during cleanup. If you spot a stubborn stain during inspection, feel free to do a spot treatment with your trusted stain remover before placing it back onto its position.
You'll need to gather your supplies before embarking on the task of deep cleaning your area textile. This might seem daunting, but it's a necessary step in maintaining the beauty and longevity of your rug. While there are benefits of professional cleaning such as thoroughness and knowledge about specific materials, you can still achieve satisfactory results by avoiding common DIY rug cleaning mistakes.
One crucial element is choosing the right cleaning solution. Many make the mistake of using harsh chemicals that can discolor or damage their rugs. Instead, opt for mild detergents or specialized rug cleaners that have been proven safe for textiles.
Next comes preventing mold and mildew - a potential issue if you're not careful during the drying process. Always ensure your rug is thoroughly dried out after washing to prevent dampness from creating an ideal environment for these unsightly growths.
Finally, removing pet stains can be one of the trickiest parts of deep cleaning a rug. These stubborn marks require patience and persistence to eliminate completely. Be sure to tackle them as soon as they occur to avoid them setting into your rug fibers.
When it comes to effective techniques for stain and dirt removal, it's vital that you're equipped with the right tools and knowledge. Spot treatment techniques are your first line of defense. As soon as a spill happens, act fast! Blot the area instead of rubbing to prevent spreading. For stubborn dirt, use a soft-bristle brush to gently scrub without damaging your rug fibers.
Now let's talk about DIY stain removers. Baking soda is great for odor and moisture absorption while white vinegar works wonders on coffee or tea stains. Always remember to do a patch test before applying any homemade solution on larger areas.
Removing pet stains can be tricky but don't panic - enzyme-based cleaners are excellent at breaking down protein-based stains like urine or vomit from our furry friends. Be sure to follow the product instructions for optimal results.
Dealing with stubborn dirt requires patience and persistence. Regular vacuuming can prevent dirt accumulation, but sometimes you may need a deeper clean using steam or professional cleaning services.
Lastly, preventing future stains is as important as knowing how to remove them. Consider using rugs in low traffic areas or treating them with fabric protectors if they're prone to spills or pet accidents. Remember, regular care extends the life of your rug so make these tips part of your maintenance routine!
After successfully removing stubborn stains and dirt from your rug using effective cleaning techniques, it's time to wrap up the process with thorough rinsing and drying methods. Rinsing is imperative in avoiding color damage and preventing residue buildup which can attract more dirt over time.
Start by thoroughly rinsing the rug with clean water. Make sure you rinse until the water runs clear. This ensures that all the cleaning solution has been removed, preventing any residue buildup that could affect your rug's texture or appearance. If you're doing this outdoors, a garden hose works well for this step.
Once you're confident all soap has been removed, move onto drying your rug. Remember, proper drying is equally as important as cleaning! Be careful not to wring out woven rugs as it can warp their shape. Instead, press down on your rug to squeeze out excess water or use a wet-dry vacuum if available.
Next comes air-drying - one of the most efficient drying methods for rugs - but keep in mind that how you hang them matters immensely to maintain their shape and form. Find an elevated spot where there's sufficient airflow for both sides of your rug, like a railing or clothesline.
However, be mindful of direct sunlight exposure when choosing a location for outdoor drying; although sun rays are excellent at eliminating bacteria and odor after washing, too much sunlight can cause color fading.
Finally, once completely dry – not just surface dry – return the rug back indoors carefully avoiding dirt contact during transportation.
In mastering these steps of rinsing and drying techniques after deep-cleaning your rugs will ensure they remain vibrant and clean longer!
It's essential to maintain your floor coverings on a regular basis to extend their lifespan and keep them looking fresh. Your rug cleaning frequency largely depends on the amount of foot traffic it gets, but generally, a good vacuuming once a week can do wonders. If you have pets or kids at home, you might need to increase that frequency.
Accidents happen and when they do, DIY stain removal is your best friend. The key here is acting fast! Don't let the spill set in; blot it immediately using a clean cloth or paper towel without rubbing it into the fibers. Then use an appropriate stain remover depending on what caused the spill.
Avoid common rug cleaning mistakes like over-wetting your rugs or using harsh chemicals which can damage its fibers and colors. Always remember less is more when it comes to water and cleaning solutions.
Choosing the right cleaning products for your rug type is crucial too. You don't want to end up discoloring your precious rug just because you used an incompatible cleaner. When in doubt, stick with mild soap mixed with water - this combo works well for most rugs.
If you're a pet owner, chances are fur shedding is one of your main issues. Invest in a vacuum cleaner with powerful suction designed for picking up pet hair efficiently.
Keeping your rug clean isn't just about appearance, it's essential for its longevity too. With the right tools and methods, you can easily deep clean your rug at home. Remember to promptly spot-clean spills and regularly vacuum. For tougher jobs or delicate rugs, don't hesitate to call in the pros. It's all worth it to keep your rug looking great and lasting long!
| Monday | 7:00 AM - 5:00 PM | |
| Tuesday | 7:00 AM - 5:00 PM | |
| Wednesday | 7:00 AM - 5:00 PM | |
| Thursday | 7:00 AM - 5:00 PM | |
| Friday | 7:00 AM - 5:00 PM | |
| Saturday | 7:00 AM - 5:00 PM | |
| Sunday | Closed |
| Monday | 8:00 AM - 5:00 PM | |
| Tuesday | 8:00 AM - 5:00 PM | |
| Wednesday | 8:00 AM - 5:00 PM | |
| Thursday | 8:00 AM - 5:00 PM | |
| Friday | 8:00 AM - 5:00 PM | |
| Saturday | 8:00 AM - 3:00 PM | |
| Sunday | Closed |
| Monday | 8:00 AM - 5:00 PM | |
| Tuesday | 8:00 AM - 5:00 PM | |
| Wednesday | 8:00 AM - 5:00 PM | |
| Thursday | 8:00 AM - 5:00 PM | |
| Friday | 8:00 AM - 5:00 PM | |
| Saturday | 8:00 AM - 3:00 PM | |
| Sunday | Closed |